If you’re ready to transform your kitchen with a fresh, stylish look, learning how to paint two-tone kitchen cabinets is a fantastic way to do so! Not only does it add depth and personality, but it can also completely change the vibe of your cooking space.
Whether you’re aiming for a bold contrast or a subtle mix, two-tone cabinets give your kitchen a modern, sophisticated edge. In this guide, we’ll show you step-by-step how to achieve this transformation, specifically for homeowners in Winter Springs, FL. Let’s get started!
Key Takeaways:
- Choose your two-tone colors based on the kitchen’s focal point and design style.
- Proper preparation is key—clean, sand, and prime before painting for a smooth finish.
- Brush or spray? Both methods work, but choose based on your project size and finish preference.
- Apply multiple thin coats of paint for better coverage and a more durable finish.
- Don’t forget the details! Reassemble carefully and add clear coat for extra protection.

How to Paint Two-Tone Kitchen Cabinets?
If you’re ready to give your kitchen a stylish makeover, painting your cabinets in two tones is a fantastic way to do it. This project allows you to showcase your personal taste and create a vibrant, inviting atmosphere. Adding two-tone cabinets brings a fresh look to your kitchen, making it feel updated and unique.
Let’s walk through the steps to ensure your cabinet painting process is easy, enjoyable, and delivers a beautiful finish.
Step 1: Decide on Your Two-Tone Color Scheme
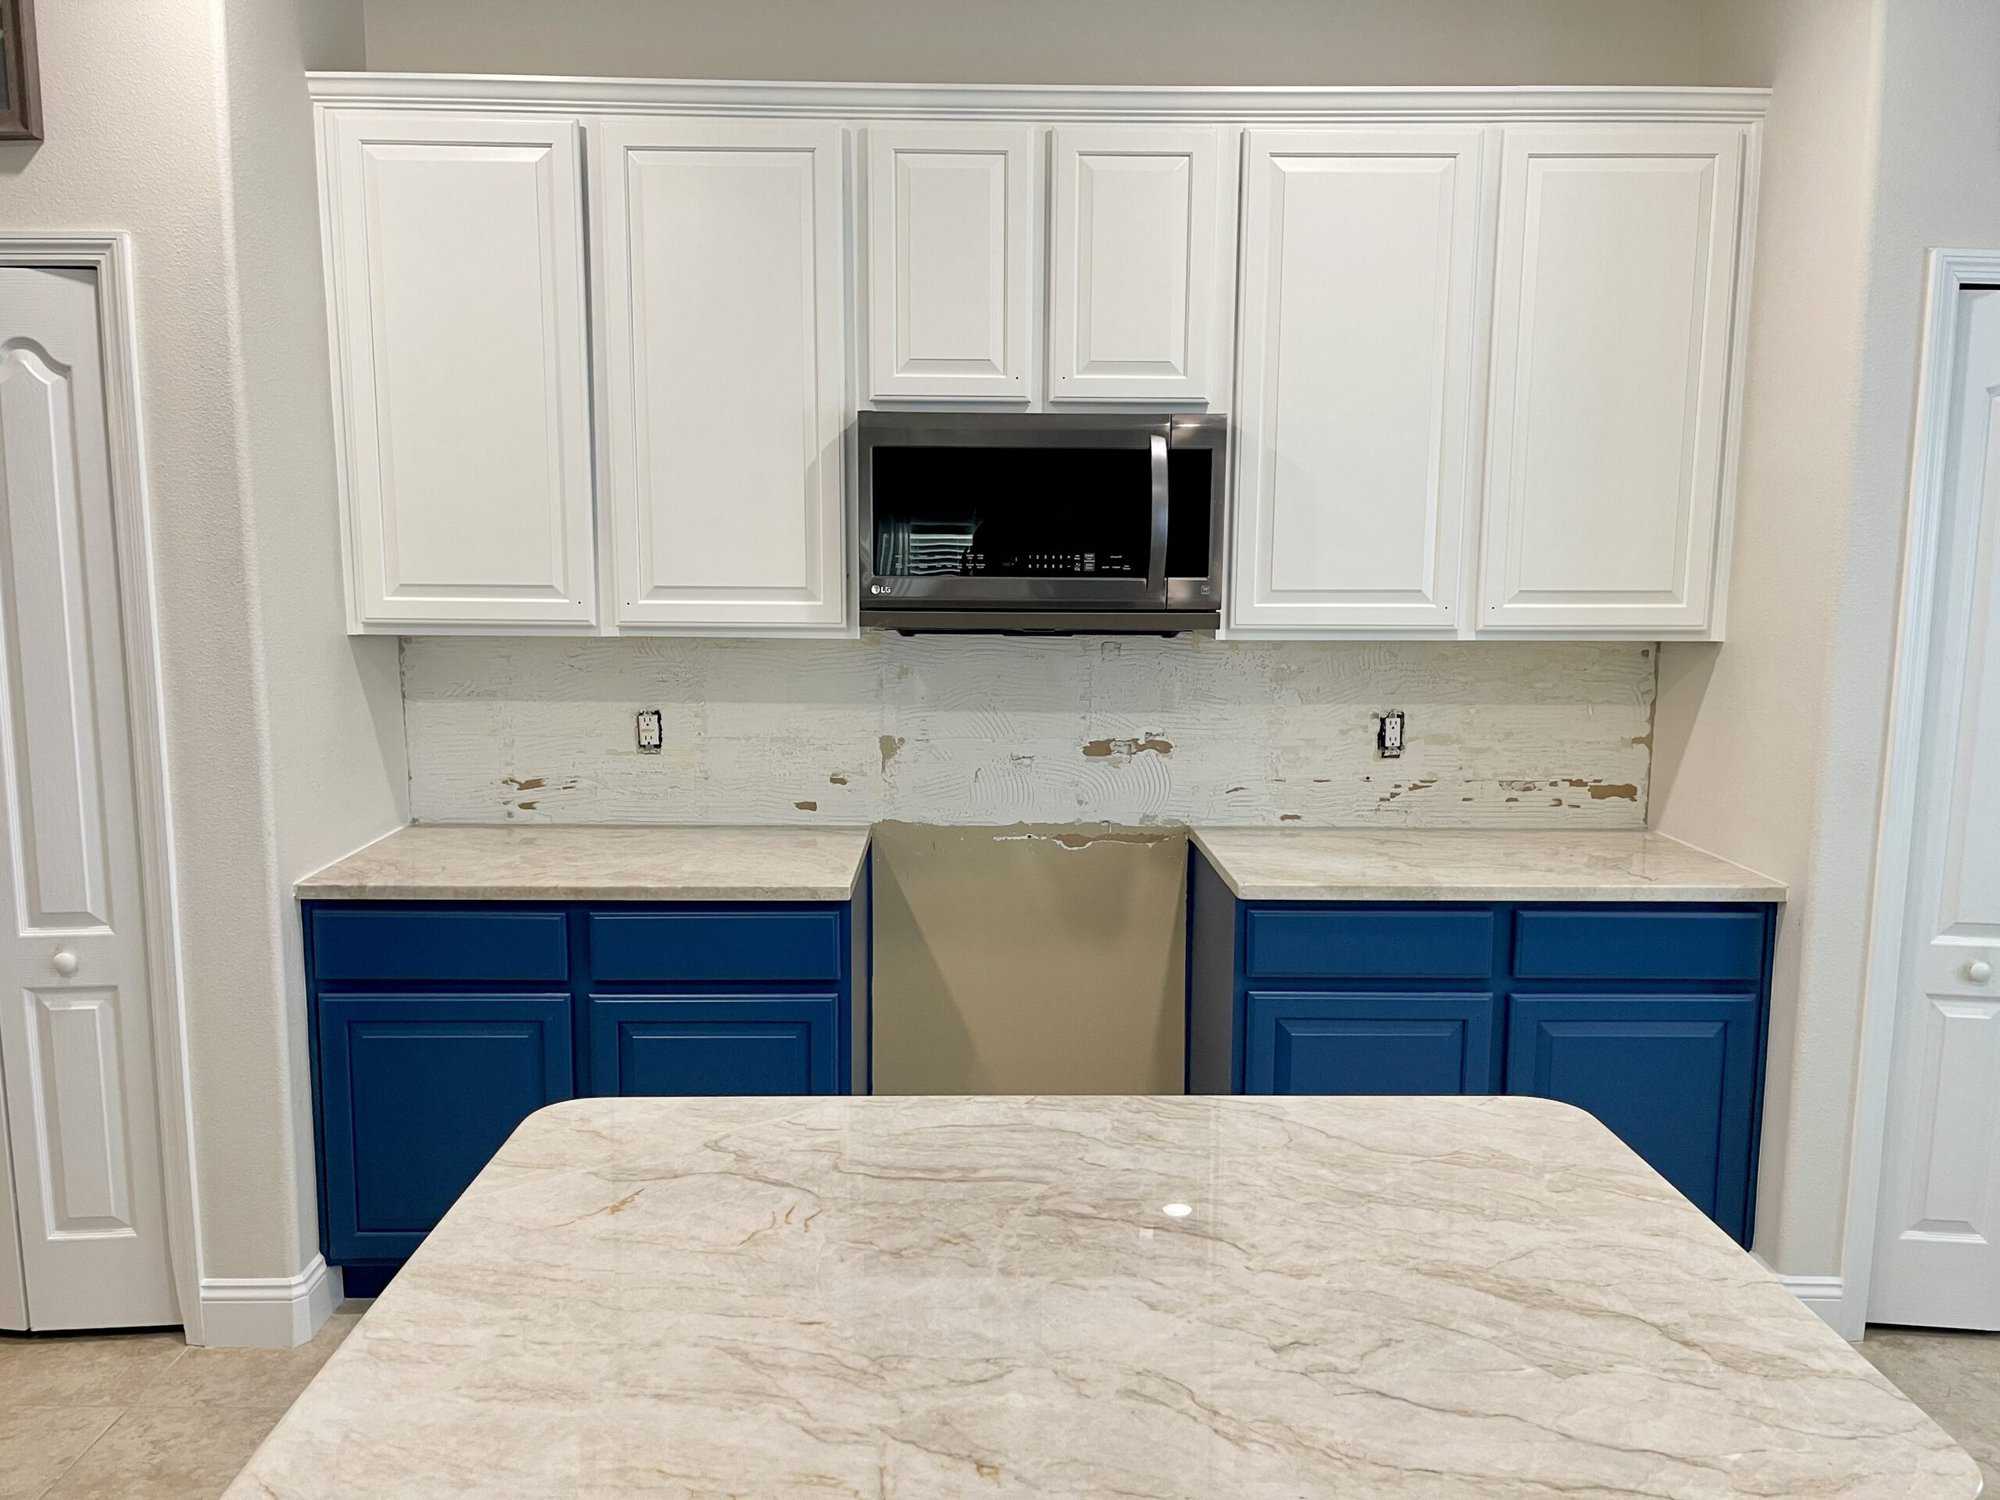
Choosing the right colors for your two-tone kitchen cabinets is crucial to getting the look you want. Start by picking a focal point in the room, such as your kitchen island or the upper cabinets. From there, decide if you want to create a dramatic contrast or a more harmonious blend of shades. Popular combinations often involve pairing a dark color on the bottom with a lighter shade on top, such as navy and white or deep gray and soft beige.
Don’t forget about the rest of your kitchen! If you have neutral flooring or countertops, consider choosing a shade that complements them. Kitchen cabinet trends show that natural wood tones also pair beautifully with bold colors like turquoise or olive green.
Step 2: Prep Your Cabinets for Painting
Before you dive into painting, the prep work is essential. Skipping this step can result in an uneven finish or peeling paint down the line. The first thing you need to do is clean the cabinet surfaces thoroughly. Use a degreaser to remove any oil, dirt, or grime from cooking. A clean surface helps the paint adhere better.
Once your cabinets are clean, it’s time to sand them lightly. This step ensures that the paint will grip the surface and provide a smooth finish. Don’t skip sanding, even if you’re using a spray paint method instead of brush paint, as it helps create a lasting bond between the paint and the wood.
After sanding, wipe down the cabinets to remove all dust. If you’re planning to apply a primer (recommended for lighter shades or wood surfaces), do so before moving on to the paint. Remember, the key to a smooth finish is taking your time during the prep work.
Step 3: Choose Your Paint – Brush or Spray?
Now that the prep work is done, it’s time to pick your paint. When it comes to how to paint two-tone kitchen cabinets, you’ve got options. You can either use a brush or a sprayer, depending on your preference.
If you’re going for the classic method, a brush and roller will do the job well, but if you’re short on time or want an ultra-smooth finish, a sprayer might be the way to go. Spray paint vs brush paint cabinets comes down to personal preference, but a sprayer can be faster and more efficient, especially if you’re covering large areas like cabinet doors.
For the best results, make sure you’re using high-quality paint specifically designed for cabinetry. Latex or oil-based paints are both excellent choices, but latex tends to be easier to work with and dries faster.
Step 4: Apply Your First Coat of Paint
Start by painting your base color on the lower cabinets (or whatever you’ve decided to be your focal point). Use long, even strokes to ensure that you don’t leave any brush or roller marks. It’s better to apply multiple thin coats than one thick coat, which can lead to drips or uneven coverage.
If you’re using a paint sprayer, move in a consistent direction to avoid uneven spots. After the first coat is applied, allow it to dry thoroughly before applying a second coat. Depending on your paint choice and the colors you’re using, you may need three coats for the best coverage.
Tip: If you’re painting over a dark color or wood that may show through, you might want to use a primer to help the lighter shades pop. It will help with paint peeling off cabinets down the line and will provide better coverage.
Step 5: Add the Second Color
Now that your base coat is dry and smooth, it’s time to add the second color. This is where you’ll bring your two-tone kitchen cabinet idea to life! Apply the second color on the upper cabinets or whichever portion you want to stand out. Use the same technique as before—long, even strokes with a brush or sprayer.
If you’re working with a contrasting color, like a bold blue or green, make sure the first coat has completely dried before applying the second. This will prevent any bleeding between the two shades and ensure clean lines.
Once you’ve painted the second color, give the cabinets time to dry completely. If you’ve been using a brush, check for any brushstrokes or uneven patches. Lightly sand them out once the paint is dry to smooth everything out.
Step 6: Reassemble Your Cabinets
After your final coat has dried, it’s time to reassemble everything. This includes putting the hardware back on the doors and drawers. If you’re installing new knobs or handles, now’s the time to add them. Just be sure to measure carefully to avoid mistakes!
If you want a more professional finish, you could also add a layer of clear coat or polyurethane to protect the paint from everyday wear and tear. This is especially important for kitchen cabinets, as they deal with food, moisture, and frequent use.
Final Touches and Maintenance Tips
Once your cabinets are fully assembled and dry, step back and admire the transformation. Two-tone kitchen cabinets can completely change the feel of your space! To maintain their beauty, make sure to clean them regularly with a gentle cleaner and avoid abrasive sponges that could scratch the surface.
It’s also a good idea to repaint your cabinets every few years, especially if they’re exposed to heavy traffic or sunlight. Budget-friendly ways to upgrade your kitchen cabinets could include touch-ups or adding new hardware to match evolving kitchen design trends.


Conclusion: Bring Your Two-Tone Kitchen Cabinets to Life
Now that you know how to paint two-tone kitchen cabinets, you’re ready to tackle this DIY project in your own home. Whether you’re in Winter Springs, FL or nearby, painting your kitchen cabinets can give your kitchen a whole new vibe.
- Start with a clear design vision.
- Clean and prep your cabinets properly.
- Use quality paints and tools.
- Apply your coats with care and precision.
Our Painting Process:
At Cabinet Coating Kings, we specialize in cabinet painting services in Winter Springs, FL, and we’re here to help make your kitchen transformation a reality. We offer professional cabinet painting services that include free estimates, and we take care of all the heavy lifting!Thorough prep work to ensure a smooth finish
- Use of top-quality paints for a long-lasting result
- Attention to detail with clean lines and perfect finishes
- Fast and efficient service with minimal disruption
- No-mess cleanup at the end of every project
Call Cabinet Coating Kings at 407-917-9535 today for a FREE estimate and bring your kitchen back to life with our expert cabinet painters in Winter Springs, FL. We proudly serve Apopka, Clermont, FL, and the surrounding areas.